

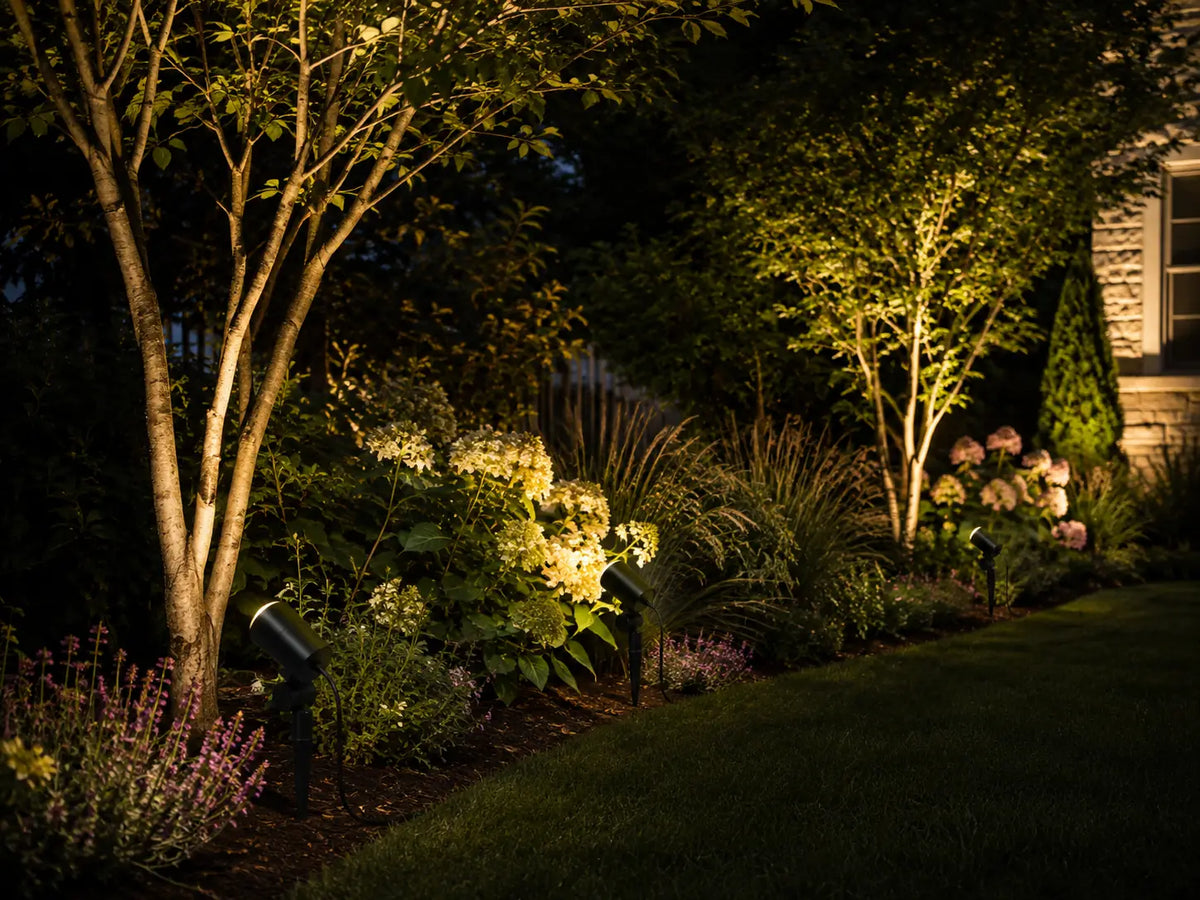
This is the one page to read before the others. It goes through a 12 V landscape lighting system the way you will actually meet it — first as an idea, then as a plan, a shopping list, an afternoon's work, a light that goes out in year four, and two more lights the spring after — and at each stage it links to the page that goes deeper. If you only read one thing, read this; if you read one thing more, read whichever section matches where you are.
What a 12 V system is
Four parts.
- The transformer. A box on the wall beside an outdoor outlet. It takes household 120 V and puts out 12 V. It also carries the photocell that turns the lights on at dusk and the timer that turns them off.
- The cable. One two-conductor cable, rated for direct burial, running from the transformer along the ground past every fixture. It is buried a few inches down.
- The fixtures. Some path lights, spotlights and hardscape lights connect to a compatible landscape cable with approved connectors. Other products are complete kits with their own supply and plug connections. Our Recessed Deck Light 16-Light Kit uses its included 12 V DC power supply on a separate run.
- The bulbs. Our current Pagoda, China Hat and Bollard path lights use replaceable G4 bulbs, and the replaceable-bulb spotlight uses MR16. Check the exact model and lamp specifications. Integrated-LED products do not take the same plug-in replacement bulbs.
Some listed, plug-in low-voltage systems are designed for homeowner installation when their instructions and local requirements are followed. Disconnect the supply before handling wires, opening fixtures or repairing a connection. Damaged cable needs repair; low voltage does not make cutting or touching energized wiring harmless.
Against line voltage. 120 V outdoor lighting means conduit, a deep trench and, in most places, an electrician and a permit. It makes sense for a lamp post at the end of a long drive. It does not make sense for thirty small lights along walks and beds.
Against solar. Solar fixtures use a panel and battery, so output and runtime depend on sunlight, weather, battery condition and settings. Some models offer timers or other controls. Compare the actual configuration and the lighting you need in solar vs low voltage.

Plan it
Walk the yard at dusk with a tape measure and a notepad, before you look at a single product page. Four things to write down.
- The walk. Door to driveway, plus any branch paths, in feet. One pace is about two and a half feet.
- What gets lit. Trees, the house face, the steps, a wall, the pond. Not all of them — a yard where everything is lit looks flat. Choose the two or three things worth seeing and let the rest go dark.
- The outlet. The transformer needs an outdoor GFCI outlet. Pace from it to where the first light will go; that length carries the whole load.
- The spacing. Treat spacing as a starting layout, not a fixed rule. Check the selected fixture’s light distribution, the width of the walk and nearby lighting. Test the positions after dark before fixing the lights in place.
Then think in layers rather than in fixtures. A walk gets path lights at ankle height. A tree or a wall gets a spotlight from below. Steps get a light in the riser. The house face gets a wash from an in-ground light. Three layers is a lit yard; one layer, however many lights, is a runway.
Plan my yard takes those four numbers and gives you back the fixture count, the transformer size, the cable length and the room you have left to grow. Twenty minutes.
Where the light goes
Before the shopping list, a short tour of the yard, because the fixture follows the job and not the other way round.
- The front walk. Use path lights to guide the walk from the drive to the entry. Start with a temporary layout, then adjust the positions after dark to check coverage and glare.
- The entry. Usually already lit by the house. If the porch light is harsh, the fix is a warmer bulb in it, not more fixtures around it.
- Trees. One spotlight from the ground, staked out from the trunk and aimed into the canopy; two for a wide tree. Pick the one or two trees that deserve it and leave the rest dark.
- The house face. An in-ground light at the base of a wall washes it upward and gives the house height at night. One per bay between windows is plenty; a wall lit end to end looks like a store.
- Steps. A light in the riser, one per step or every other step. This is the one place where lighting is about not falling, and a path light beside the step throws its shadow across the exact edge you need to see.
- The patio. Low and warm: under the cap of a seat wall, recessed into the deck edge, a spotlight into the one tree beside the table. Nothing overhead, nothing bright. People sit where the light is soft.
- Water. A pond light under the surface, aimed at the far bank or up through a fountain. Pond kits come with their own transformer and timer.
Three of those layers is a yard. All seven is a yard that reads flat, because when everything is lit nothing is.

Choose the parts
Fixtures, by job.
- Path lights — a hood on a stem, light down onto the walk. 3 W each. The workhorse; which one for which walk is its own page.
- Spotlights — a beam from ground level up into a tree or across a wall. 5 W each; a wide tree takes two. How to aim one matters more than which one.
- In-ground lights — flush with the ground, washing a wall or a facade from below. 12 W.
- Step and deck lights — choose by mounting method and supply requirements. The 2.5 W Half-Moon rail light is distinct from the recessed 16-light kit, which has its own 12 V DC supply.
- Hardscape lights — for installation under the cap of a retaining wall or seat wall. Confirm the selected model’s input load and supply requirements before including it in your system plan.
- Pond lights — sold as kits with their own transformer, photocell and timer, so they stay off the main run.
Material. Cast aluminum is the residential standard and what most of the replaceable-bulb lines are made of. Brass is heavier, weathers dark, and costs more. Stainless is for transformer housings and the recessed deck light. All three are made for wet ground; plastic and thin stamped metal are not.
The bulb question. For the fixtures that stand in the open — path lights and spotlights — the thing you cannot see in the photograph is whether the bulb comes out. A socketed fixture takes a stock G4 or MR16 bulb, and when it fails you change a bulb. A sealed fixture is replaced whole. Recessed step, in-ground, hardscape and pond lights are sealed by design, because they sit in a riser, in the ground or under water; that is a fair trade there, and ours say so on the product card. A path light on a stem has no such reason, so look for the socket on its spec sheet.
The transformer. Add the input load of compatible fixtures and check the total and per-zone limits in the instructions. For the referenced HIBOITEC dual-zone models, keep lamp load within the recommended 80% allowance and retain 20% headroom after additions. Check cable voltage drop separately. See the transformer guide.
The cable. The gauge decides how far the run can go before the last light dims. The feed from the transformer to the first light is the piece to get right. The wire guide covers which gauge when, and when a run should be split.
Kit or singles. Compare what is included and how additions are connected. A kit with its own power supply or proprietary plugs is not automatically compatible with the yard's main landscape circuit. Check the exact fixture and supply instructions before extending it.

A first system, worked once
A typical front yard: a 40-foot walk from the drive to three steps at the door, a Japanese maple by the corner of the house, and an outlet on the garage wall about 20 feet from where the walk starts.
- Path lights at 8 feet: 40 ÷ 8 is 5, plus one, is six. Six at 3 W is 18 W.
- Compatible 2.5 W surface-mounted lights for the steps: three make 7.5 W. This example does not use the recessed 16-light DC kit.
- The maple: two spotlights, because it is wide. Two at 5 W is 10 W.
- Total example load: 35.5 W. With an assumed 20% planning reserve, 35.5 ÷ 0.8 is about 44.4 W. A compatible 100 W transformer would leave capacity in this illustration; the current HIBOITEC standalone range is 200 / 300 / 600 W. Check each model's circuit limits and cable voltage drop.
- Cable: 20 feet of feed, 40 feet of walk, plus 30% for weaving and slack — about 80 feet. Buy the 100-foot spool.
This is a load-planning example, not a ready-to-order kit: six 3 W path lights, three compatible 2.5 W surface-mounted lights and two 5 W spotlights. Choose the actual supply, connectors and wire from their instructions and the cable route. Plan my yard can help organize the preliminary count.
Reading a product page
The specs that matter, and what they mean, so the product page reads as plain English.
- W (watts) — how much power the light draws. It is what you add up for the transformer. It is not brightness, though within one type of fixture more watts is usually more light.
- K (kelvin) — the color of the light. 2700 K is warm, like an old incandescent bulb; 3000 K a touch whiter. Both belong on a house. Above that starts to look like a parking lot.
- Lumens — the light output. Useful for comparing two fixtures of the same type; not useful for deciding how many you need, which is a spacing question, not a brightness one.
- Beam angle — on a spotlight, how wide the light spreads. Narrow for a tall tree, wide for a spreading one.
- IP rating — describes a product’s protection against dust and water under specified conditions. Select the rating and installation method required for the exact location, and follow the product instructions. A rating alone does not establish suitability for every outdoor or underwater use.
- G4 / MR16 — the bulb socket, which tells you the light takes a stock bulb. A card that says integrated LED means the light itself is the replacement unit.
- Cast aluminum / brass / stainless — what the body is. All three are made for wet ground.
- 12 V AC/DC — check the fixture's exact accepted input and the supply's output. A product requiring its supplied DC adapter is not automatically suitable for an AC landscape transformer. A 120 V fixture belongs to a different system.
Install it
Some listed, plug-in low-voltage systems can be installed by homeowners when the product instructions and local requirements allow it. Plan the work around the exact system and site. Disconnect power before handling wires or opening fixtures. Work on household-voltage wiring or a new or modified outlet belongs with a qualified electrician.
The two rules that save the most grief are test before you bury and leave a loop of slack at every fixture. The install guide has each step with what goes wrong at it. Uplighting a tree well is a separate skill and has its own page.
When something fails
Something will, eventually, and it helps to know the order in which things fail on a buried 12 V system, because it is also the order in which to look.
- A connection. A loose, wet or damaged joint can leave one light or a section dark. Disconnect power before inspecting it, and repair it with a connector approved for the conductor sizes and installation conditions. This is a useful inspection point, not a measured claim about the most frequent failure.
- A bulb. One light out, its connector dry. In a socketed fixture it is a stock bulb from the bulb collection or any hardware store; you change it standing up. In an integrated fixture the light itself is the replacement unit.
- The cable. A spade, an aerator, a new shrub. Everything past the cut goes out at once. Find the cut, splice with a sealed connector, bury again.
- The supply and controls. A whole outage can involve the power source, protection, timer, cable or transformer. Check the documented sequence for the model, and stop resetting a protective device if it trips again.
Connections, cable, lamps and fixtures can each need service. A replaceable lamp can reduce what you replace when the lamp is the failed component, but it does not establish the cause of every outage. For coverage and claim conditions, refer to the warranty terms and confirm the terms that apply to your specific product and purchase.
Add to it next year
Every yard grows. The two lights by the shed, the new bed, the tree that got big enough to be worth lighting. A 12 V system is built for this if two things were done at the start.
- The transformer has headroom. Add lights only within the unused part of the model's recommended lamp-load allowance. For a 200 W unit planned at 80%, 44 W already connected leaves 116 W available within the 160 W allowance; the other 40 W stays as headroom. Recheck per-zone limits and cable voltage drop after the addition.
- There is slack in the ground. The loop of cable coiled beside each fixture is what lets a light move a foot, and the capped end of the run is where the new lights join.
When the additions outgrow the transformer, or when part of the yard should run on a different schedule, that is a second transformer — a planning question that the transformer page covers under zones.
Through the year
- Spring. Walk the run before the beds fill in. Straighten any stake the frost heaved, wipe the lenses, and re-aim the tree lights as the leaves come back.
- Summer. Mulch and mowing. Keep mulch off the top of the path lights, and keep the mower's deck clear of the stems — a path light set back a deck's width from the lawn edge survives; one on the edge does not.
- Fall. Leaves on the lenses and, once they are down, tree lights aimed at a canopy that is no longer there. Lower the beams onto the branching. Move the timer's off hour earlier as the evenings lengthen, if you want.
- Winter. Snow over a path light is a path light that is off until it melts, and that is fine; the run does not mind. A snow shovel is what breaks stems — mark the fixtures nearest the walk with a stake before the first storm.
The words
- 12 V — a nominal low-voltage supply. Confirm AC/DC and permitted input range, and disconnect power before working on the wiring.
- Transformer — the box that turns 120 V into 12 V and carries the photocell and timer.
- Tap — a terminal on the transformer. Most have a 12 V tap; some have a higher one for a run whose far end has gone dim.
- Run — one cable from the transformer, with fixtures joined along it.
- Gauge — the thickness of the cable's conductors. A lower number is thicker and carries farther.
- Connector — the sealed joint between a fixture's lead and the cable.
- Photocell — the sensor that switches the lights on at dusk.
- Timer — what switches them off, at a fixed hour or at dawn.
- Zone — a group of lights on its own schedule. Zones are timing, not geography.
- 2700 K / 3000 K — the color of the light. 2700 is warm, the color of an old incandescent; 3000 is a touch whiter. Both belong on a home; cooler does not.
- G4 / MR16 — the two stock bulb sockets in serviced fixtures. G4 in path lights, MR16 in spotlights.
- IP65 — a stated level of dust and water protection. Check the exact product instructions and permitted installation conditions before choosing where to use it.
- GFCI — the kind of outlet the transformer plugs into outdoors. It trips when it senses a fault, which is why it is the first thing to check when everything goes out.
Questions people ask
What is low voltage landscape lighting?
Landscape lighting powered by a low-voltage supply rather than household voltage at the fixtures. Some systems use a common landscape cable; others are kits with dedicated supplies and connectors. Follow the exact system instructions and local installation requirements.
Is 12 V landscape lighting safe?
Low voltage reduces some electrical hazards but does not make live work, damaged wiring or wet connections harmless. Use the specified outdoor-rated supply, cable, connectors and protection, and disconnect power before service. Household-voltage outlet work belongs with a qualified electrician.
How many lights can one transformer run?
Use the fixtures' specified input load and the transformer's total and per-circuit limits. With an assumed 20% reserve, a 100 W example allows 80 W of load, or 26 fixtures at 3 W; this is arithmetic, not a tested maximum or a current product listing. Check compatibility and cable voltage drop as well.
Do you need an electrician for low voltage landscape lighting?
Some listed, plug-in low-voltage systems can be installed by a homeowner following the supplied instructions and local requirements. Disconnect power before handling wiring or opening fixtures. If the job involves installing or changing an outdoor outlet or other household-voltage wiring, use a qualified electrician.
Next
Plan my yard — the lights, the transformer and the cable for your yard
Next: how to install low voltage landscape lighting


